
Yesterday evening at 6:00, I noticed something that made my heart smile - it was still daylight! That can only mean that spring is right around the corner, which got me in the mood to make something springy.
This week (through today), the Hobby Lobby closest to me has a killer sale on ribbon (all spools 50% off) and Easter items (40% off), so I had gone earlier in the week to stock up on some ribbon and other miscellaneous supplies. Oh, how I love Hobby Lobby......But, I digress. Spring in the air + New spring ribbon in the stash = A perfect recipe for making a spring ribbon wreath. So, that's exactly what I did.
As I mentioned in an earlier post, Jen at Tater Tots and Jello (not to be confused with Jen, as in me) posted a great ribbon wreath tutorial for Halloween a couple of years ago. I found her tutorial on Pinterest. I followed her instructions pretty closely, but, as per usual, I did make a few minor variations.
Here's what you will need:
Here's what you will need:
-5 foot long pieces of ribbon in varying colors, patterns and widths. I like to use at least 2, but no more than 3 coordinating colors. For this one, I (finally) decided on pink, purple, and green. Try to use between 10 and 14 different ribbon patterns.
-Scissors
-Ruler
-4.5 inch cardboard square
-Hot glue gun
-12-inch styrofoam wreath frame
Using your ruler, measure off 5 feet of each style of ribbon. I always do this by wrapping my ribbon around my ruler, lengthwise, 5 times and then cutting it off from the spool.

*Pay no mind to the yellow ribbon shown in these next few pictures. I decided against using it for this particular wreath after I measured and cut it*

*And for the love of all things good in this world, please pay no mind to my uncoordinated comfy clothes or my foot, which will also appear in the next few pictures*
After you have measured and cut each long piece of ribbon, wrap each piece around a 4.5 x 4.5 inch square of cardboard. I just made my square out of a Birchbox top.


When you reach the end of your ribbon, slide it off the cardboard square and cut at opposite ends.


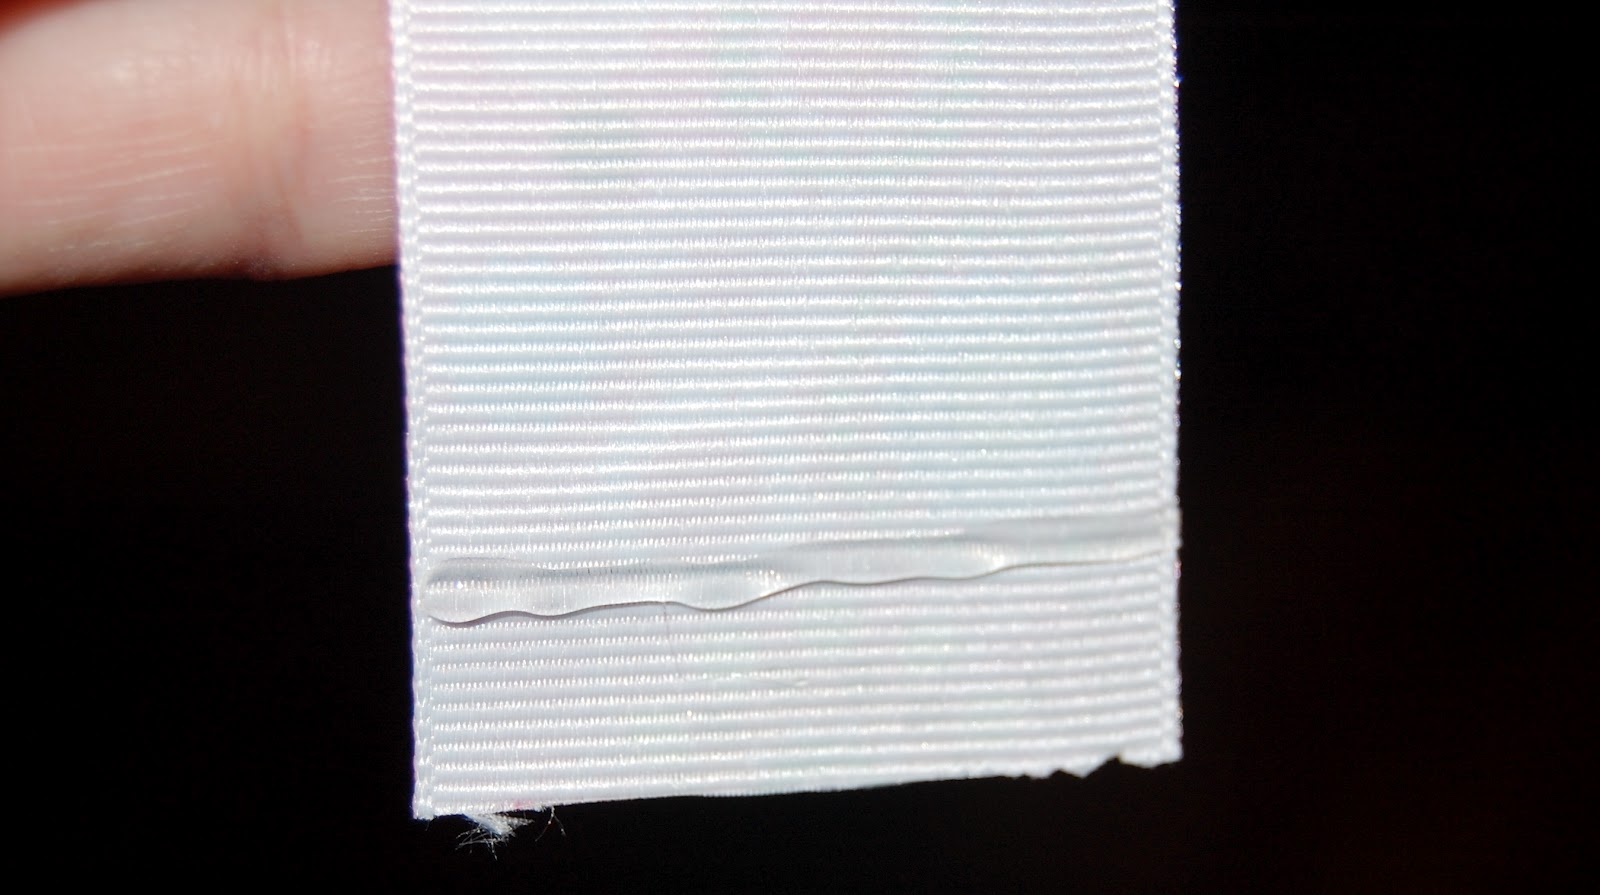
Now it's time to make your loops. Apply a thin line of hot glue to the one end of your ribbon (on the underside). Leave about a quarter of an inch between your glue line and the bottom of the ribbon. Fold the ribbon over so that you have a loop with the right side of the ribbon on top. If you have a sewing machine, you can also sew the loops closed. I don't have a sewing machine, so I just used my trusty hot glue gun. Note: If you plan on using any sheer ribbon, set your glue gun to the lowest heat setting, as the glue will seep through sheer ribbon and burn your fingers! One 5-foot piece of ribbon should make 11-15 loops, depending on how tightly you wrapped your ribbon around your cardboard.

After you've made all your loops, it's time to work on your wreath frame. Some people paint their frames with spray paint or craft paint, others cover their frames with scrap fabric; but I like to wrap mine in a solid color ribbon that coordinates with the color loops that will be on the wreath. It's best to leave your ribbon on the spool while you're doing this, that way you don't have to worry about trying to measure a huge length of ribbon and then not have enough to cover your frame, as happened to me once. Glue the loose end of your ribbon to your frame and start wrapping it around and around, gluing down every so often. Once your frame is completely covered, cut your ribbon and glue the end down.


Now, start gluing your loops to your covered frame. Select 10 loops made from the same ribbon and put the extras aside to use for later. Fold open your loops at the bottom and apply a line of glue along the seam in the loop. Stick the loops to your frame at all different angles and in various places around the wreath (inner edge, outer edge, smack dab in the middle). Use your loops made from the wide ribbons first because it is much easier to fill in the gaps with your narrower ribbons.


Once you have all your wide ribbon loops on, give your wreath a good looking over and see where you need to stick your narrow ribbon loops to fill it out. Don't forget to use the pile of extras loops you set aside earlier. *Note, there is a fine line between having a wreath full of gaps and a wreath with so many loops packed on it that everything looks mashed flat.*

Once you have glued all your loops to your frame, tie/glue a ribbon hanger at the top. I usually just do a simple loop and glue the ends to the back of the frame, but this wreath is so pretty and springy, I thought it was just screaming for a pretty bow at the top. If you choose to tie a bow, cut a little inverted "v" in the ends (called "chevroning") to help keep your ribbon from fraying. You can also add some kind of glittery (or blingy as I like to say) embellishment if you want. But I think this wreath looks just fine without anything like that.

*Warning: My photographer (Husband) went to bed somewhere in the middle of all the loop gluing, so I had to improvise and hang the wreath from the doorknob on the coat closet after it was finished so I could get a picture of it hanging.*
And there you have it! A beautiful springtime ribbon wreath! Now, did I hear somewhere that it's supposed to snow this weekend? Oh, well. If it does and I'm stuck inside, I'm busting out the Mod Podge, glitter, and plastic Easter eggs and working on my next creation =)
Yet another lovely wreath! I am so envious that you live near a Hobby Lobby. It's a 1-1/2 hour trip for me....
ReplyDeleteThanks, Patsy! I'm pretty sure Husband wishes we lived very, very far away from a Hobby Lobby. Or that I would get a second job to pay for my craft habit =)
ReplyDelete