Here's a little quote from Newt Gingrich regarding unemployment benefits - “Unemployment compensation should be changed, so that in order to get unemployment compensation you sign up for a business led training program, so we are modernizing our workforce. Never again should we pay somebody 99 weeks for doing nothing. In 99 weeks, you can earn an associate degree. I mean, think about the total waste of human capability when you teach people to sit at home for 99 weeks. It’s fundamentally wrong and a violation of the Declaration of Independence commitment that we have the right to pursue happiness.”
I agree with you, Newt. I believe that if you don't have a job, then your job should be finding a job. I don't believe that people who are too lazy/hooked on drugs/used to "working" the system/(insert social ill here) to get out and look for a job should be compensated for sitting on their asses and watching Swift Justice reruns every day.
But I dare say that those people who have been laid off by their employers aren't "doing nothing" for 99 weeks. I would almost guarantee you that the average working-class American who suddenly finds himself or herself out of a job (because Mexican labor is cheaper than American labor and robotics are cheaper than human labor) is spending the bulk of his or her time actively seeking a new job. Because they have NOTHING to fall back on - no savings, no investments, no wealthy relatives, and no government to bail them out. I mean, sure, if we were all wealthy enough to live off of what our investment portfolios earn, then sitting poolside at our vacation homes for 99 weeks, while drawing a 378.00 (if we are Virginia residents and top earners) weekly check from the government wouldn't be such a bad gig. But that's not how most of the country - you know, the country you are trying to become the next President of - lives. Middle-class Americans make barely enough to pay their bills each month. Middle-class Americans have to decide between taking their children to the dentist and replacing their broken refrigerators.
Now, I understand that we as a nation have fallen on hard times. To be downright frank, the economy SUCKS. Boy, it sucks big ones. But I do believe that a lot of the blame for our economy's suckiness falls squarely in the laps of you and all the politicians and lobbyists like you. Oh, yes. I did just call you a lobbyist. And I think that it is an absolute disgrace that the only people who can run for President of this (once) great nation are people like you. Millionaires who are career politicians who have made a name for themselves kissing the asses of the corporations who screw the average, everyday voters in this country and by doing so, have run the USofA straight into the ground.
And don't even get me started on Rick Santorum's "snob" comment.
Tuesday, February 28, 2012
Sunday, February 26, 2012
Ribbon Topiary

Diaper Motorcycle

Some friends and I are planning a baby shower for one of our co-workers, and I volunteered to make a diaper cake. So, of course I immediately went to Pinterest to look for ideas. I found a TON of great ideas on on there for diaper cakes of the traditional variety. And then I ran across a pin from Sweetaprils for a diaper motorcycle. So that's what I decided I would make. Her tutorial was so easy to follow and I didn't stray from her instructions one teeny tiny bit, so I didn't feel the need to post step-by-step instructions here. Super easy, super cute, and it didn't take very much time at all to make.

I think it turned out well :)
Wednesday, February 22, 2012
Pink, Purple, and Green

I finished another wreath tonight! A detailed tutorial can be found here. I tied some tulle around the frame before I started gluing the ribbon loops on (that step isn't shown in the instructions). It's a good thing I have a LOT of tulle, because I really like how it looks on these wreaths. Also, I tied a bow at the top of the hanging loop. I had to crop it out of this picture, though, because Husband's arm was in the way (he was holding the wreath up for me while I took the picture).
The Stinkeye and a Rant

Progeny has the stinkeye. For those of you who don't live in the Southwest Virginia Coalfields, let me translate: Progeny has pinkeye. I'm sure that, should I write a post tomorrow, it will contain the sentence, "Adam and I have the stinkeye." I probably won't bother to add another translation so those who read it can either cruise back through my previous posts to find the translation included here or live the rest of their lives with a burning curiosity as to what exactly is ailin' me and mine.
Viral conjunctivitis notwithstanding, I am in an Earl Pitts kind of mood today (picture above - handsome feller, ain't he?) Again, for those of you not from the Southewest Virginia Coalfields, here is a sampling of some Earl Pitts. Familiarize yourselves. I'll wait......
Wasn't that great? Now, on with the rant.
You know what makes me sick? If you don't now, you're getting ready to. Because I'm letting 'er rip with both barrels today. What pisses me off more than anything - ANYTHING - on this whole entire earth is when people can see something coming from a mile away, do nothing about it, and then wring their hands and cry "how did this happen" when they are finally faced with the consequences of their inaction. Y'all know exactly what I'm talking about. We all know people/companies/governments that are guilty of doing this.
Here is a broad, completely figurative example: Some people (and I say "some" because common sense is not a quality held by the majority these days) who realize their roof is leaking would climb on top of their house and fix the leak before the next big rain comes. Problem solved. But then you have those (not so) few who don't fix their leaky roofs, then cry when they come home one rainy day to find a pond in their living rooms. Fix your roof before it rains again = staying dry during the next storm. Sitting on your ass and playing Farmville until the next frog strangler rolls around = a wet floor and moldy carpeting.
An ounce of prevention is worth a pound of cure, folks! Fix the little problems before they become bigger problems. And if you're too stupid and/or lazy to do that, then please don't expect me to feel sorry for you when your roof rots and you have a soggy floor. There are plenty of other stupid and lazy people out there to feel sorry for you and help you out should that happen.
Monday, February 20, 2012
Rats and Child Birthin'

Fabulous! There's definitely no silver lining to be found in that mystic interpretation. I should have stopped there. But did I? Absolutely not. I just had to add a little more anxiety to the morning before I'd even had my shower. So, I researched my labor & delivery dream. According to The Experience Project, dreaming about delivering a baby means change is a-comin'.
I should have stopped after the I found out the meaning of my rat dream. Better yet, I never should have looked up either dream in the first place. I can deal moderately well with betrayal, poverty, and anything else that the rats might be trying to warn me about. But change? Change is a different story! I am the world's biggest change-hater. Strife and danger? I won't bat an eye. But the slightest change and/or variation from my daily routine will leave me feeling unglued for days.
So, thank you, Google. Thank you for always giving me an answer to whatever questions I may have. And thank you, intensely curious and can't leave a question unanswered personality. I almost dread tonight's bedtime because of the two of you. Almost, but not quite. Because the truth is, it's been a long day and I have an extremely comfy and warm bed to go crawl into. And the world's best kiddo to kick me in the back all night long. (Yeah, we're a co-sleeping family. What of it?)
So, bring it on, change! But if you could please wait until in the morning after I've had a good night's sleep to show your disruptive face, that would be super.
Sunday, February 19, 2012
Pink, Green, and Yellow

Even though it's snowing outside, I'm still thinking spring! The full tutorial for this wreath can be found here. I decided this this time to play around with some tulle and I tied it around the frame in several places before I glued the ribbon loops on.
Saturday, February 18, 2012
Spring Colors Ribbon Wreath

Yesterday evening at 6:00, I noticed something that made my heart smile - it was still daylight! That can only mean that spring is right around the corner, which got me in the mood to make something springy.
This week (through today), the Hobby Lobby closest to me has a killer sale on ribbon (all spools 50% off) and Easter items (40% off), so I had gone earlier in the week to stock up on some ribbon and other miscellaneous supplies. Oh, how I love Hobby Lobby......But, I digress. Spring in the air + New spring ribbon in the stash = A perfect recipe for making a spring ribbon wreath. So, that's exactly what I did.
As I mentioned in an earlier post, Jen at Tater Tots and Jello (not to be confused with Jen, as in me) posted a great ribbon wreath tutorial for Halloween a couple of years ago. I found her tutorial on Pinterest. I followed her instructions pretty closely, but, as per usual, I did make a few minor variations.
Here's what you will need:
Here's what you will need:
-5 foot long pieces of ribbon in varying colors, patterns and widths. I like to use at least 2, but no more than 3 coordinating colors. For this one, I (finally) decided on pink, purple, and green. Try to use between 10 and 14 different ribbon patterns.
-Scissors
-Ruler
-4.5 inch cardboard square
-Hot glue gun
-12-inch styrofoam wreath frame
Using your ruler, measure off 5 feet of each style of ribbon. I always do this by wrapping my ribbon around my ruler, lengthwise, 5 times and then cutting it off from the spool.

*Pay no mind to the yellow ribbon shown in these next few pictures. I decided against using it for this particular wreath after I measured and cut it*

*And for the love of all things good in this world, please pay no mind to my uncoordinated comfy clothes or my foot, which will also appear in the next few pictures*
After you have measured and cut each long piece of ribbon, wrap each piece around a 4.5 x 4.5 inch square of cardboard. I just made my square out of a Birchbox top.


When you reach the end of your ribbon, slide it off the cardboard square and cut at opposite ends.


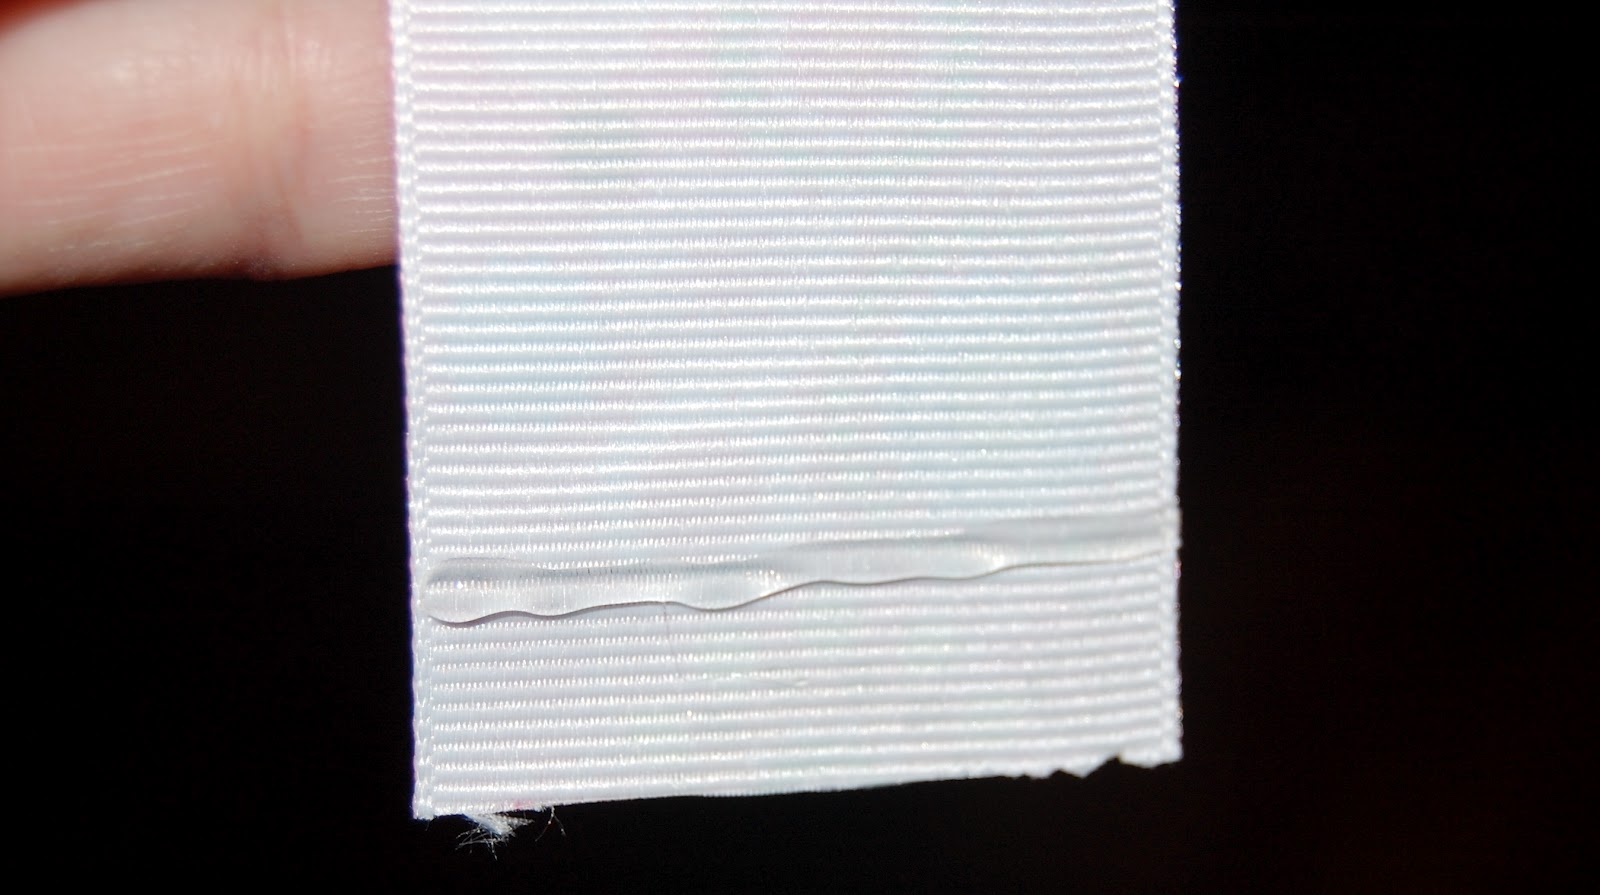
Now it's time to make your loops. Apply a thin line of hot glue to the one end of your ribbon (on the underside). Leave about a quarter of an inch between your glue line and the bottom of the ribbon. Fold the ribbon over so that you have a loop with the right side of the ribbon on top. If you have a sewing machine, you can also sew the loops closed. I don't have a sewing machine, so I just used my trusty hot glue gun. Note: If you plan on using any sheer ribbon, set your glue gun to the lowest heat setting, as the glue will seep through sheer ribbon and burn your fingers! One 5-foot piece of ribbon should make 11-15 loops, depending on how tightly you wrapped your ribbon around your cardboard.

After you've made all your loops, it's time to work on your wreath frame. Some people paint their frames with spray paint or craft paint, others cover their frames with scrap fabric; but I like to wrap mine in a solid color ribbon that coordinates with the color loops that will be on the wreath. It's best to leave your ribbon on the spool while you're doing this, that way you don't have to worry about trying to measure a huge length of ribbon and then not have enough to cover your frame, as happened to me once. Glue the loose end of your ribbon to your frame and start wrapping it around and around, gluing down every so often. Once your frame is completely covered, cut your ribbon and glue the end down.


Now, start gluing your loops to your covered frame. Select 10 loops made from the same ribbon and put the extras aside to use for later. Fold open your loops at the bottom and apply a line of glue along the seam in the loop. Stick the loops to your frame at all different angles and in various places around the wreath (inner edge, outer edge, smack dab in the middle). Use your loops made from the wide ribbons first because it is much easier to fill in the gaps with your narrower ribbons.


Once you have all your wide ribbon loops on, give your wreath a good looking over and see where you need to stick your narrow ribbon loops to fill it out. Don't forget to use the pile of extras loops you set aside earlier. *Note, there is a fine line between having a wreath full of gaps and a wreath with so many loops packed on it that everything looks mashed flat.*

Once you have glued all your loops to your frame, tie/glue a ribbon hanger at the top. I usually just do a simple loop and glue the ends to the back of the frame, but this wreath is so pretty and springy, I thought it was just screaming for a pretty bow at the top. If you choose to tie a bow, cut a little inverted "v" in the ends (called "chevroning") to help keep your ribbon from fraying. You can also add some kind of glittery (or blingy as I like to say) embellishment if you want. But I think this wreath looks just fine without anything like that.

*Warning: My photographer (Husband) went to bed somewhere in the middle of all the loop gluing, so I had to improvise and hang the wreath from the doorknob on the coat closet after it was finished so I could get a picture of it hanging.*
And there you have it! A beautiful springtime ribbon wreath! Now, did I hear somewhere that it's supposed to snow this weekend? Oh, well. If it does and I'm stuck inside, I'm busting out the Mod Podge, glitter, and plastic Easter eggs and working on my next creation =)
Wednesday, February 15, 2012
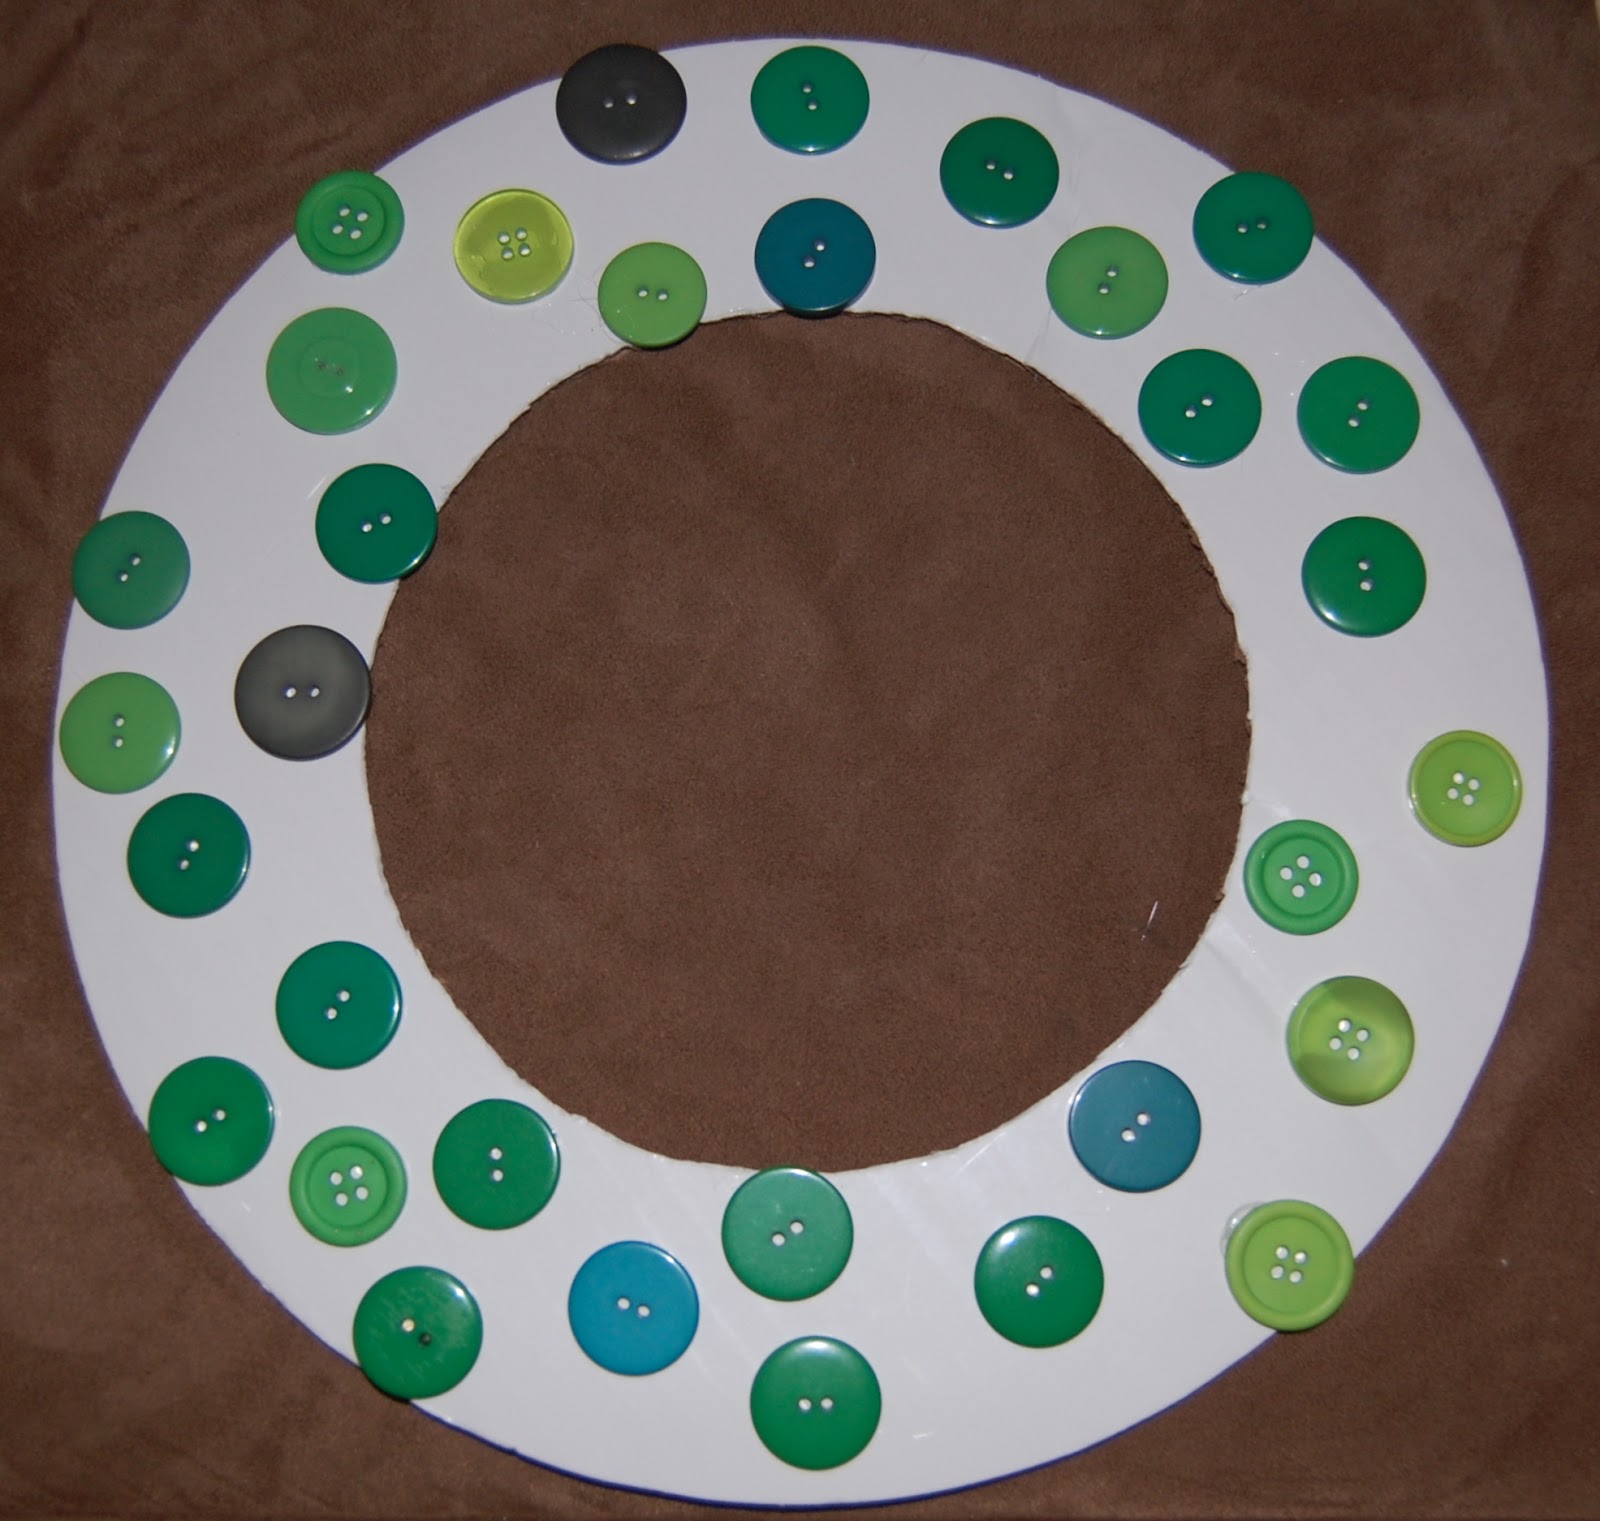
St. Patrick's Day Button Wreath
I have been wanting to make a button wreath ever since I saw this one on Craftapalooza. And, as an aside, I absolutely LOVES me some Craftapalooza. Nicole, the blog's author, is a crafting Jedi. She lives in Australia, which means her choice of words is so different (and I think so much more interesting) than what someone from the Appalachian mountains is used to hearing. But of course, I can't follow instructions worth a hoot, so I had to make a few variations. So, without further ado, here is my foray into button wreath making, documented and posted for the whole world to read:
You will need:
Buttons. And depending on the size of said buttons, you might need LOTS of them. I found a huge lot of green buttons on eBay for super cheap and then I also raided my mom's button hoard and picked out all the green ones. Sorry, Mom!
Glue - We will get more specific about this later
Cardboard - I used a cake circle because it was already round, but any kind of thick cardboard will do
Ribbon
Blingy, glittery embellishments (totally optional)

To cut out your center hole, use something round as a guide, then trace and cut. I used a Tupperware lid and an xacto knife. Use some sandpaper or an emery board to file down any rough edges. And remember, the hole doesn't have to be perfectly centered. By the time you get the buttons on, everything will look much more even.

Starting with your largest buttons, place them all over your wreath just to get an idea of how far apart to place them. Once you have them in place, start gluing.

Which brings us to the glue talk. Nicole on Craftapalooza (see above) said NOT to use a hot glue gun. Did I listen? No. Do I wish I had listened? Yes! Next time, I will use Gorilla glue or something of the sort. I have burns on my fingertips that I'm not sure will ever heal. A friend of mine once said her glue gun released napalm instead of melted glue. I believe I have the same model that she does. Lesson learned. Glue and glue and glue and keep on gluing. Stack to cover the gaps in between buttons and glue some more. Once you're done gluing, you will have a somewhat heavy wreath chock full o' buttons. And if you don't heed my warning about using a hot glue gun, you will also have done (possible) irreparable damage to your fingertips.

Now, use some pretty ribbon or fabric to make yourself a hanger. I found some sweet antique ribbon in my mom's stash while I was looking for her button collection. Cut a length of ribbon long enough to go around the top of the wreath and hang down several inches. Glue one end to the back of the wreath.

Loop the ribbon around the front of the wreath and glue the other end down.

Next, it's time to add your optional blingy and/or glittery embellishment(s). I found this shamrock spinner at Michael's. It already had a ribbon loop at the top, so I just glued the top of the loop to the back of the wreath - right over top of my hanger. Who's going to see the back of the wreath, anyway? I mean besides everyone who might read this.

Let your wreath dry on a flat surface just to be sure your it doesn't buckle, and you're done! I had Adam hold ours up to the back of the front door just to get an idea of how it would look hanging.

So, there you go. Cute, super easy, and super cheap to make, especially if you already have buttons on hand.
Now, I wonder if this will convince a Leprechaun to leave a pot o' gold at me front door this year?
You will need:
Buttons. And depending on the size of said buttons, you might need LOTS of them. I found a huge lot of green buttons on eBay for super cheap and then I also raided my mom's button hoard and picked out all the green ones. Sorry, Mom!
Glue - We will get more specific about this later
Cardboard - I used a cake circle because it was already round, but any kind of thick cardboard will do
Ribbon
Blingy, glittery embellishments (totally optional)
For starters, take your cake circle (I found this pack of 12-inch circles in the wedding aisle of the craft section in Wal-Mart) and flip it over so the unfinished side is facing up.

To cut out your center hole, use something round as a guide, then trace and cut. I used a Tupperware lid and an xacto knife. Use some sandpaper or an emery board to file down any rough edges. And remember, the hole doesn't have to be perfectly centered. By the time you get the buttons on, everything will look much more even.

*Note - Next time, I think I will either paint the cardboard or wrap it in ribbon, just so the gaps between the buttons won't be so obvious*
Starting with your largest buttons, place them all over your wreath just to get an idea of how far apart to place them. Once you have them in place, start gluing.
Which brings us to the glue talk. Nicole on Craftapalooza (see above) said NOT to use a hot glue gun. Did I listen? No. Do I wish I had listened? Yes! Next time, I will use Gorilla glue or something of the sort. I have burns on my fingertips that I'm not sure will ever heal. A friend of mine once said her glue gun released napalm instead of melted glue. I believe I have the same model that she does. Lesson learned. Glue and glue and glue and keep on gluing. Stack to cover the gaps in between buttons and glue some more. Once you're done gluing, you will have a somewhat heavy wreath chock full o' buttons. And if you don't heed my warning about using a hot glue gun, you will also have done (possible) irreparable damage to your fingertips.

Now, use some pretty ribbon or fabric to make yourself a hanger. I found some sweet antique ribbon in my mom's stash while I was looking for her button collection. Cut a length of ribbon long enough to go around the top of the wreath and hang down several inches. Glue one end to the back of the wreath.

Loop the ribbon around the front of the wreath and glue the other end down.

*There my fingers are, flirting with the dangerous glue gun.*
Next, it's time to add your optional blingy and/or glittery embellishment(s). I found this shamrock spinner at Michael's. It already had a ribbon loop at the top, so I just glued the top of the loop to the back of the wreath - right over top of my hanger. Who's going to see the back of the wreath, anyway? I mean besides everyone who might read this.

Let your wreath dry on a flat surface just to be sure your it doesn't buckle, and you're done! I had Adam hold ours up to the back of the front door just to get an idea of how it would look hanging.

So, there you go. Cute, super easy, and super cheap to make, especially if you already have buttons on hand.
Now, I wonder if this will convince a Leprechaun to leave a pot o' gold at me front door this year?
Hopeful and Waiting
Adam's surgery went really well! In fact, the doctor said it went great. He (Dr. Wang) said that, even though Adam's pancreas and the lymph nodes near his pancreas are still inflamed, he didn't see anything that looked like cancer to him. But, we have to wait on the results of the various tissue samples and biopsies that he took during surgery just to be sure. We hope to hear something by the first of next week. Adam and I both went back to work today and Connor is back in day care, so I feel like a bit of normalcy has finally returned to our little house.
I cannot begin to thank everyone enough for all of their prayers, encouragement, and kindness through all this. Please continue to remember him while we wait for all of the results to come back, as we are still anxious about what we find out. We are EXTREMELY hopeful, though!
I cannot begin to thank everyone enough for all of their prayers, encouragement, and kindness through all this. Please continue to remember him while we wait for all of the results to come back, as we are still anxious about what we find out. We are EXTREMELY hopeful, though!
Sunday, February 12, 2012
My Husband's Pesky Pancreas
Today, we leave for UVA. Tomorrow is the day.
Without going into a long, drawn-out narrative which includes every little detail, here's a little history for those of you who might not know what's going on.
Right before Thanksgiving, Husband was diagnosed with pancreatitis and had to have his gallbladder removed. It ruptured during surgery, so he was in the hospital for almost a week. After he returned home, he continued to feel and look (sorry, Hun) worse every single day. He was yellow. He lost his appetite. He lost 25 pounds in just a few weeks. Finally, after weeks of bad blood test results, the NP at his primary care doctor's office (who just so happens to be one of my very best friends and one of the smartest people I know) called and told us to pack a bag and drive to Charlottesville. So we did.
Adam was admitted to the hospital at UVA two weeks before Christmas. His bile duct was dilated and his liver was, for lack of a better description, stopped up with old bile which had begun to thicken. He had surgery to place a stent in his bile duct to hold it open and allow the bile to drain properly. I watched his color return to normal in a matter of hours and we came home two days later.
About a month after his first surgery, his doctor in Charlottesville ordered an MRI of his liver to see how everything was looking. His nurse called with the results a few days later and said that the MRI showed a mass on his pancreas. She said the only way to differentiate between autoimmune pancreatitis (where your immune system attacks your pancreas and bile ducts) and pancreatic cancer is a biopsy. She had dropped the "C" bomb. And I was scared to death.
Adam's case was reviewed by the tumor board at UVA and the board agrees that it looks like AIP. But once again, a biopsy is the only way to be sure. His doctor also ordered a blood test to see if his immune system is making antibodies to fight his pancreas. Antibodies high = most likely AIP and great news. Normal antibodies = diagnosis still unknown. Adam's antibodies are normal. I know that this doesn't really tell us anything more than we already knew and a biopsy was going to be necessary no matter what the results of the blood test were, but it feels like a HUGE strike against a positive outcome.
So, tomorrow Adam will be having surgery for the doctor to look at his pancreas and look at his bile ducts and draw tissue samples. Samples which will, no doubt, take several days to analyze and report back on. I feel like the sum total of my life will come down to what gets sucked out into that little syringe. Adam is hopeful and we are praying. First for good results, then second for the strength and grace to make it through whatever comes our way.
Tuesday, February 7, 2012
My Newest Hero
I absolutely LOVE Moms Who Drink and Swear. Nicole (the O.G. Mom Who Drinks and Swears) is ballsy and unapologetic in her writing, which is mostly about life with her kids. A lot of her posts are about the nitty-gritty, feces-smeared life of a mom and she shares them. With the world. And she is HILARIOUS! I love her blog so much that I also "liked" the MWDAS Facebook Page, because I knew that I wouldn't get so annoyed with her blowing up my news feed that I would then turn around and un-like it.
So, today I'm scrolling through my feed and see a MWDAS post about a blog I'd never heard of, telling its author to rest in peace. And of course, being the nosey person that I am, had to immediately go to the mystery blog and read. And I read. And I sobbed.
ToddlerPlanet - The Joy of Life After Cancer is a blog written by Susan Niebur, an astrophysicist and mother of two. She was diagnosed with inflammatory breast cancer five years ago. All I had to read were the words "breast cancer" and I was immediately captivated. I have a sister who was diagnosed with breast cancer when she was the same age that I am now. Thankfully, she survived. It recurred 9 years later, and she survived again. But there isn't a day that goes by now that I don't think, "Sis was first diagnosed when she was your age, when will you find 'the lump?'"
ToddlerPlanet is so much more than just an "I'm a cancer survivor" blog. It's a courageous, faith-filled, and informative record of an extraordinary life. Susan Niebur has been added to my list of heroes. And I bet she will be added to yours, too, if you take a moment (or two) to read her story.
Saturday, February 4, 2012
Makin' Laundry Detergent
Last night was "make laundry detergent" night at my house. I made my first batch of homemade laundry detergent right after Christmas after seeing a recipe from Why Not Sew? on Pinterest. Husband and I decided that, since the ingredients were so cheap, it wouldn't hurt to make a batch to try. We agreed that if we didn't like it, we would just trash the batch and go back to buying store bought detergent. Turns out, we like our homemade detergent! This makes me happy because I think it's fun to make and oh, so much cheaper than buying detergent in the store.


Here's what you will need:

1 large (at least 12 quart) stockpot - It's best to use one you don't ever plan on cooking in again
1 bar of soap - Obviously, we used Irish Spring but use whatever kind smells good to you
1 cup 20 Mule Team Borax
1 cup Arm & Hammer Washing Soda
1 large (preferably quart-sized) measuring cup
Funnel
Grater
Empty containers - I used empty gallon jugs, but you can use pretty much anything you have on hand. Just be sure to rinse the containers well before using them
To start, fill your stockpot with 2 gallons of water. Heat on the stove over medium heat. While your water is heating, grate your bar of soap into your stockpot.

Continue to heat until all of your soap shavings have dissolved.

Once your soap has dissolved, add 1 cup each of Borax and Arm & Hammer Washing Soda.

*Note - I had pre-measured a cup of each and put them both into one large measuring cup that way I only had to pour once
Bring the mixture to a boil and let boil for 5-10 minutes. Watch it carefully to make sure it doesn't boil over. Your mixture will begin to thicken and take on a slimy consistency.

Remove from heat and (carefully!) pour the mixture into a 5-gallon bucket, then add 1 gallon of cold water.

Cover and let sit overnight. Your mixture will cool and thicken considerably. The next morning, it should look like this:

Stir your mixture well. I mean really stir the heck out of it. If you have a stick blender or a drill that has a paint stirrer attachment, use it. I don't have either, so I just used a spoon with a long handle and some muscle.
Dip your detergent mixture from your bucket and funnel it into your container. Use 3 parts detergent and 1 part water to fill your containers. This is why I like using gallon jugs and a quart-sized measuring cup - it makes the 3:1 part very easy!

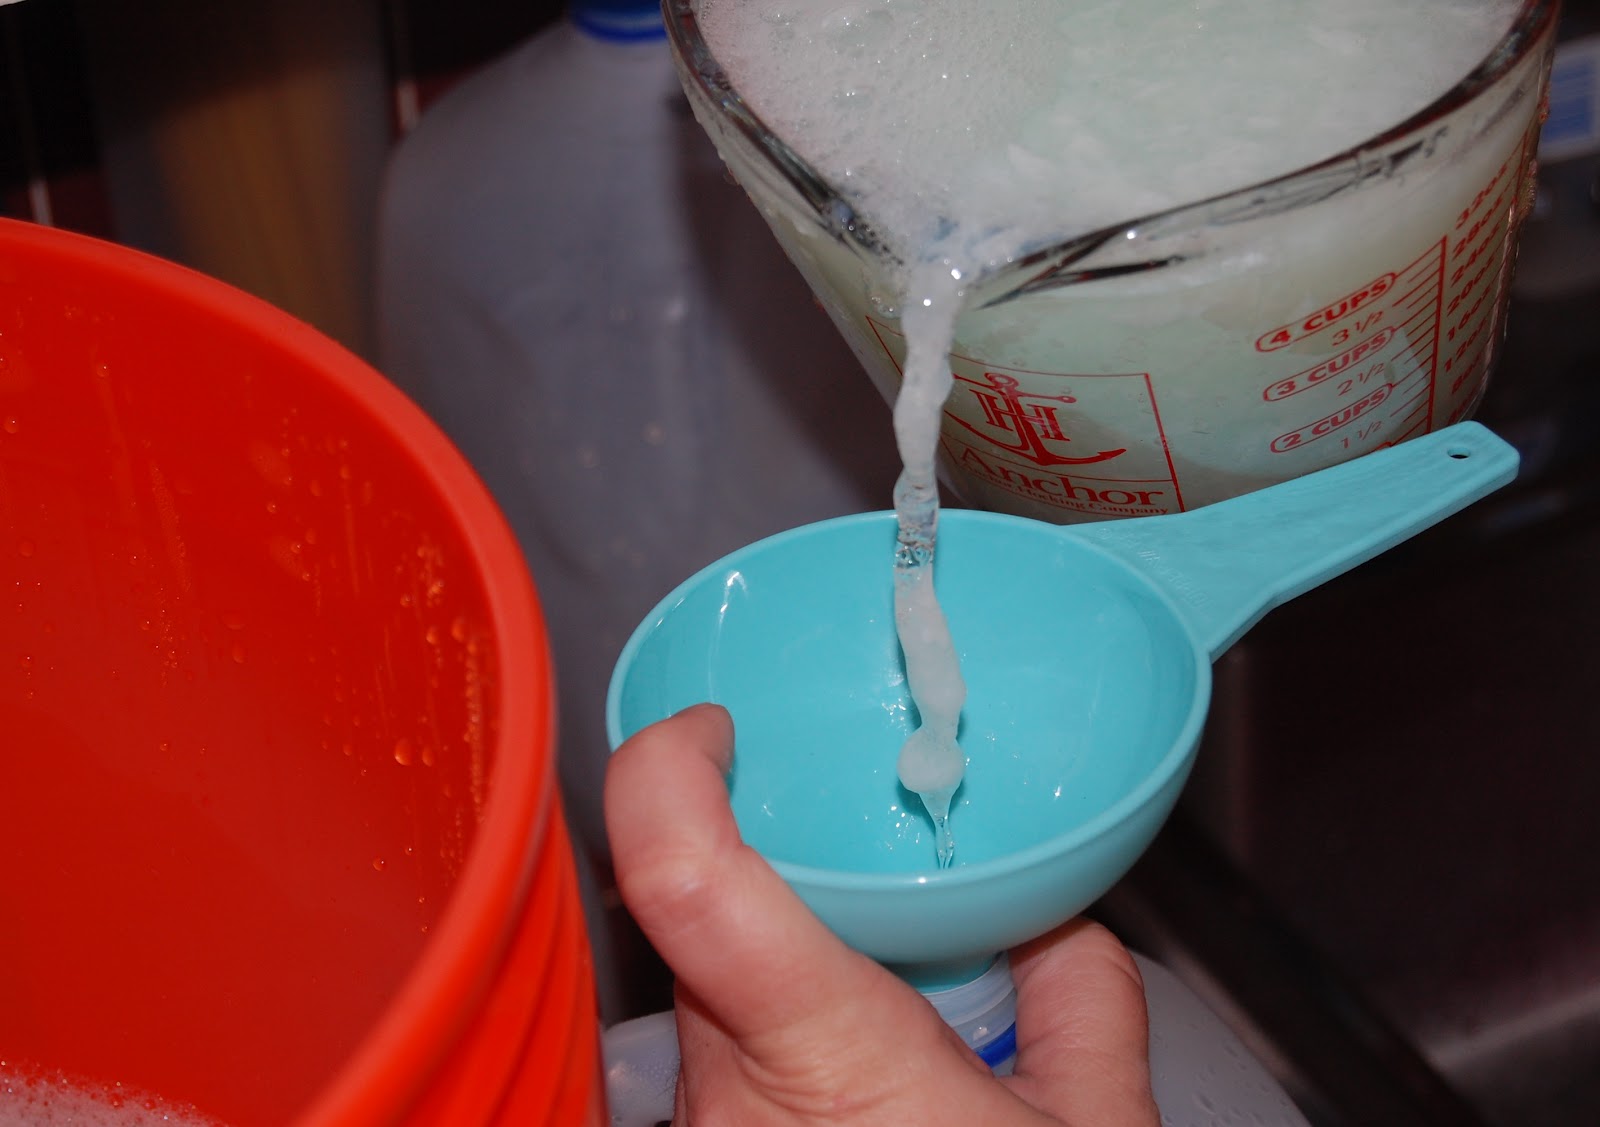

This batch actually used a little more than 3 and a half gallons, but the water bottles I used to hold the overflow didn't look very nice in the picture so I left them out.
And that's it! Just shake well before each use and use 1/2 - 3/4 cup of detergent per load, depending on load size.
A few things to remember:
-This detergent will not create very many (if any) suds. But my clothes are just as clean using this as they are when we used store bought detergent. And they come out of the washer feeling much softer!
-For tough stains, pre-treat. This was not something I had to get used to doing, because having a toddler in the house means pre-treating his clothes regularly, even when we used store bought detergent.
-Don't pour the detergent directly onto your clothes. I did that once and noticed some white spots on the laundry (which washed right out the next time around).
-Everything I have read online says this detergent is safe for HE washers. I still use an old-fashioned top-loader, though, so I can't speak from experience on that one.
-If anyone in your household has sensitive skin, you can try using a half a cup of Borax instead of a whole cup, or just leave it out altogether. Stains might be a little tougher to get out without the Borax, but it isn't an absolutely essential ingredient.
-Speaking of Borax, there has been a lot of controversy lately surrounding Borax and its safety and link to potential fertility problems. I have done a LOT of research on the topic and found this article by Crunchy Betty to be the most informative. Besides, the Duggars use Borax and I'm pretty sure there aren't ANY fertility problems in that family.
Good luck! I hope you enjoy your homemade detergent (and your savings) as much as I enjoy mine!
Thursday, February 2, 2012
Wreaths!
When I started making these wreaths, the idea of blogging about my adventures in crafting had not occurred to me, so I didn't take pictures of each step as I worked. But I thought I would post a few pictures of wreaths I made, along with what few in-progress pictures I did snap. The full tutorial can be found here: http://tatertotsandjello.com/2010/09/happy-halloween-wreath-tutorial.html. Please note - I do not own a sewing machine (yet) so instead of sewing my loops closed, I hot glued them. Warning - if you do this, please be careful to not burn your fingers, especially if you decide to use any type of sheer ribbon. I'm not sure my fingerprints will ever be the same.
Here is the ribbon after I measured and cut it:

Wreath #1 - Finished:

Wreath #2 - In progress:

Wreath #2 - Finished:

Here is the ribbon after I measured and cut it:

Wreath #1 - Finished:

Wreath #2 - In progress:

Wreath #2 - Finished:

What a Day!
Maybe I'm going through a mid-life crisis. Maybe the stresses of a (mildly) sick husband, a toddler who has suddenly become VERY independent and assertive, and an extremely demanding job have just worn me down. Whatever the case, today was a doozy.
Today, I have felt like there is literally no hope in the world. At all. Now, the calm and rational side of me (and that side of me is very small on the best of days, mind you) knows that there is always hope to be found. But my irrational, stressed out to the max self was more than happy to ignore that logic. I am stressed to the point that my hair is falling out. No lie. Falling out by the handfuls, it is. It clogs up the drains, hangs on everything I get near, and is taking over my car. I am afraid to cook anything that someone else might eat for fear of them finding a hair in their food and thinking I am gross, which I'm not, by the way.
It just occurred to me today, if I were to stroke out whilst sitting at my desk and leave this old world behind, would anything I have done career-wise have been worth the sacrifices I have made personally? Answer - ABSOLUTELY NOT! Now, I'm not trying to kid myself into thinking that I can or ever will change the world or cure horrible diseases, but I would like to think that I could somehow contribute to making the world a little better. The problem is, with what I do for a living, there isn't even the remotest possibility of that happening. Ever.
So maybe that's why I started this blog. Maybe I will make someone laugh. Or share a great idea with them for how to make their home a little more beautiful. Or save some money. Mainly, I think it will be cathartic (and a lot cheaper than therapy) for me to write about my life and share that with others. And maybe, just maybe my next post will be about a sweet craft instead of me moaning about my problems. Stay tuned!
Subscribe to:
Posts (Atom)